# Model Creation
# Camera Mouse Simple
A model is a collection of 1 to n components, where a component represents a plugin of the ARE. These components are connected via channels (for data connections) and event channels (representing events). The following example will illustrate the creation of a simple webcam mouse, using the position of the nose to control the cursor and opening the mouth to trigger a mouse click. This model requires a connected and installed webcam.
# Add Facetracking
In a first step, start the ACS and the ARE using the ACS.exe and ARE.exe short cuts. In the ACS window select the tab Components, then Sensors and within the sensors the menu item Computer Vision. There select the component FacetrackerLK. The component is now on the drawing area and, if the component is selected, properties can be set (or changed) in the rightmost part of the ACS window.

# Add Mouse
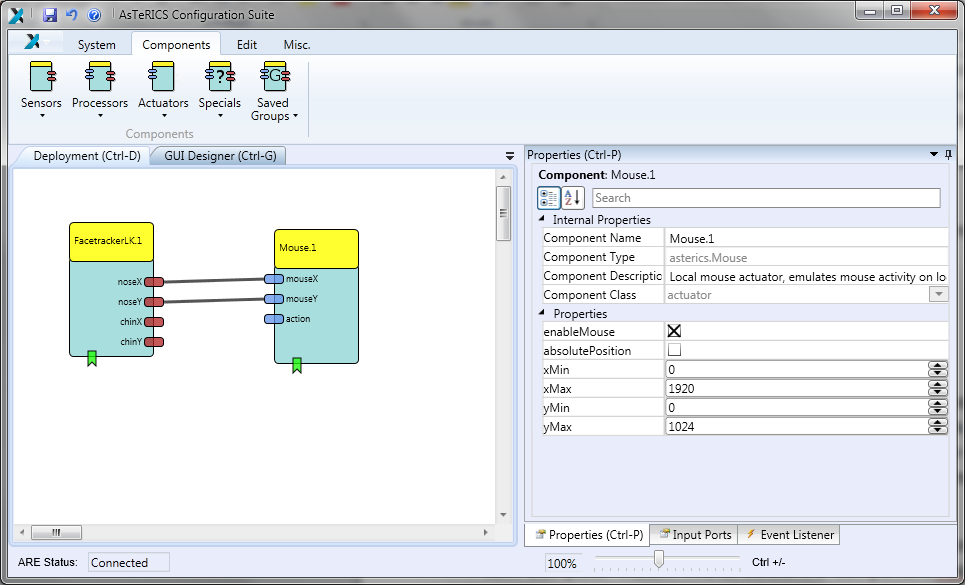
The next needed component is the Mouse, it can be found by selecting Actuators -
Input Device Emulation. After the insert, select the Mouse component and adapt
the properties. Deactivate absolutePosition and set the xMax and yMax to your
screen resolution.
In the next step, connect the noseX and the noseY outputs of the XFacetrackerLK with the mouseX and mouseY inputs of the Mouse. Finally, it should look like the screenshot below.
# Add Mouse Click
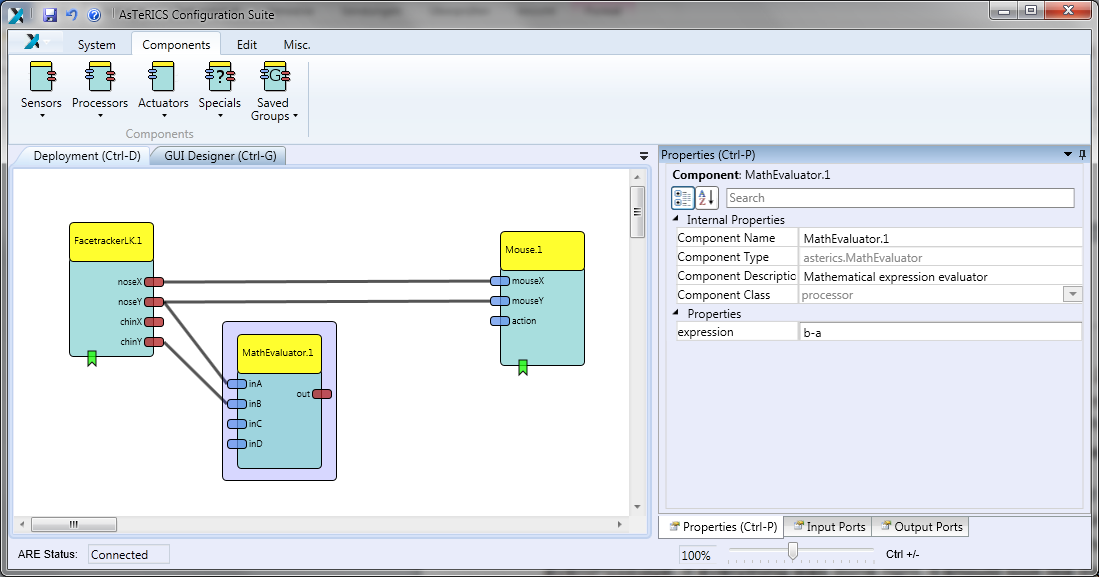
The model now would be able to use the coordinates of the nose to control the mouse cursor, but the mouse click is still missing. For the mouse clicking functionality, we first need the MathEvaluator (Processors - Basic Math) plugin. We connect the noseY output of the XFacetrackerLK the with the inA input of the MathEvaluator and likewise the chinY with inB. In the properties of the MathEvaluator, we set the property expression to b-a.
We will Differentiate (Processors -> Basic Math) the out value to react on a fast change of the nose to chin distance.
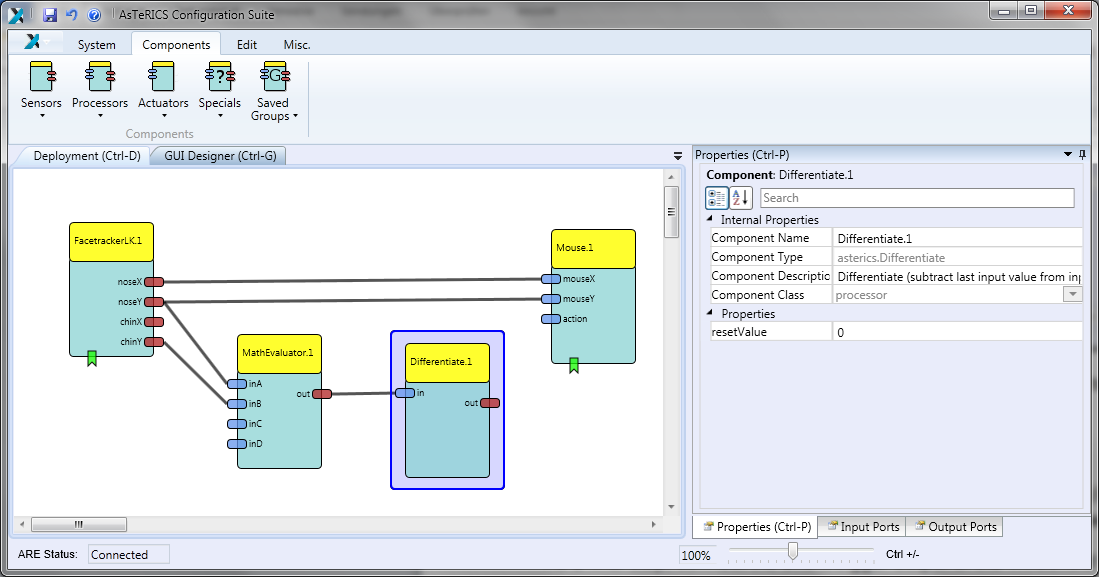
This processed value will then be forwarded to a Threshold (Processors -> Basic Math) component. Set the thresholdLow and thresholdHigh values to 30.
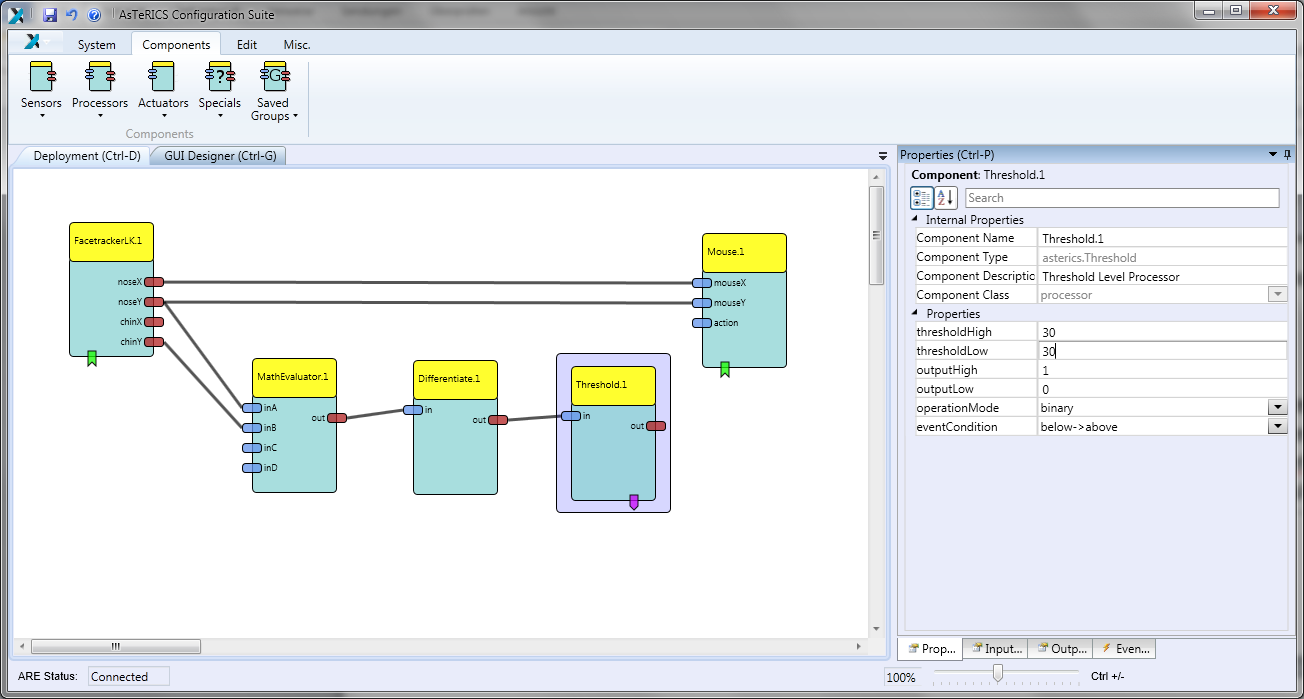
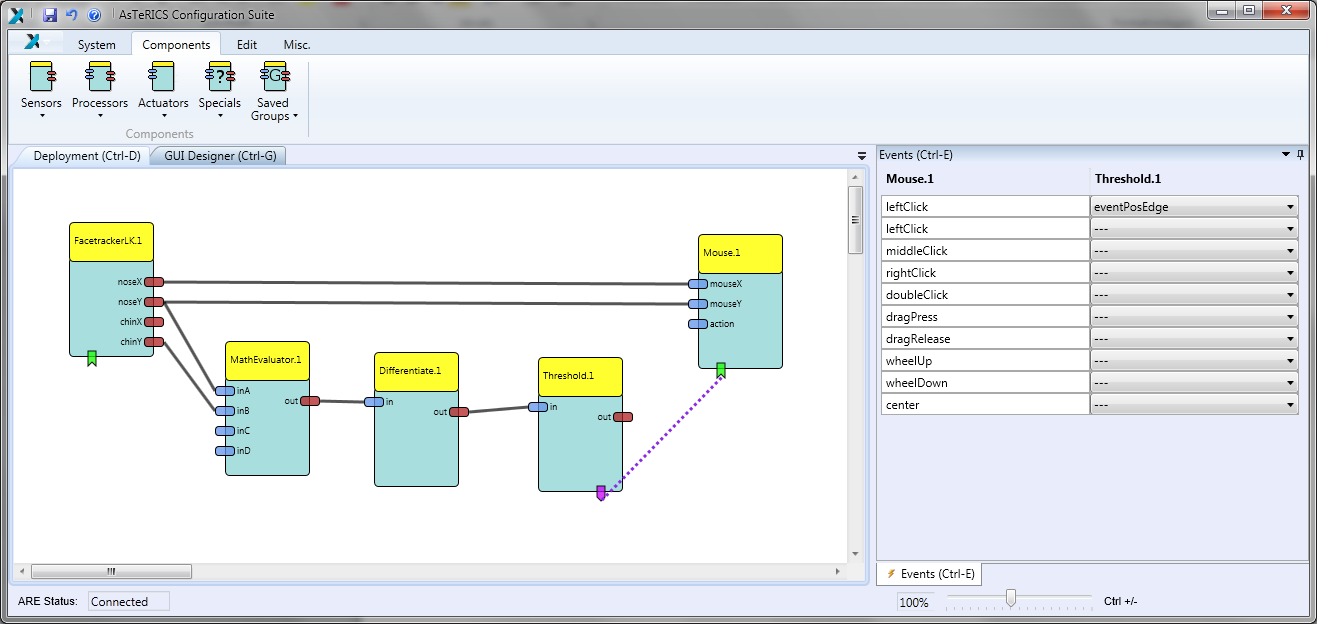
As a final step, connect the event trigger output of the Threshold with the event listener input of the Mouse – the event triggers and listeners are at the bottom of the components. After the connection has been made, set the leftClick to eventPosEdge in the property editor at the right. If everything was done right, it should look like the following screenshot:
# Test Model
Now, upload the model to the ARE and press the Start Model button. A window with the camera screen will appear, marking with a green and yellow circle - the position of nose and chin. Press the Stop Model button or press F7 to stop the model and get the control of the mouse back. Below is a screenshot of the system, when running.
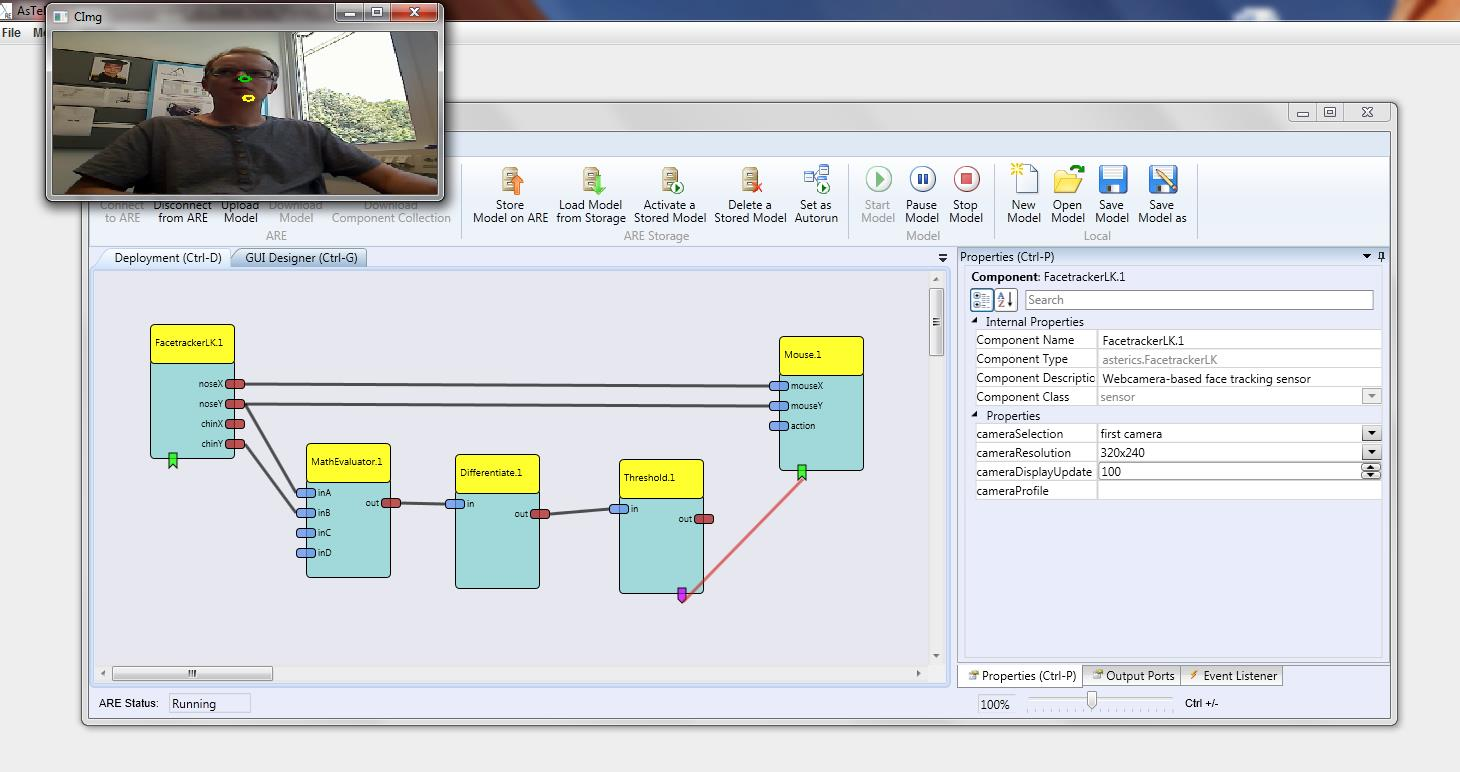
Congratulations, your first AsTeRICS model is running!
# Reducing Tremor
You might have noticed that the mouse pointer has a tremor, because the head is always in movement to a certain extent. To reduce this tremor, an Averager (Processors -> Basic Math) will be used to smoothen the X coordinates and another Averager for the Y coordinates between the XFacetrackerLK and the Mouse. The bufferSize in the properties will be set to 5.
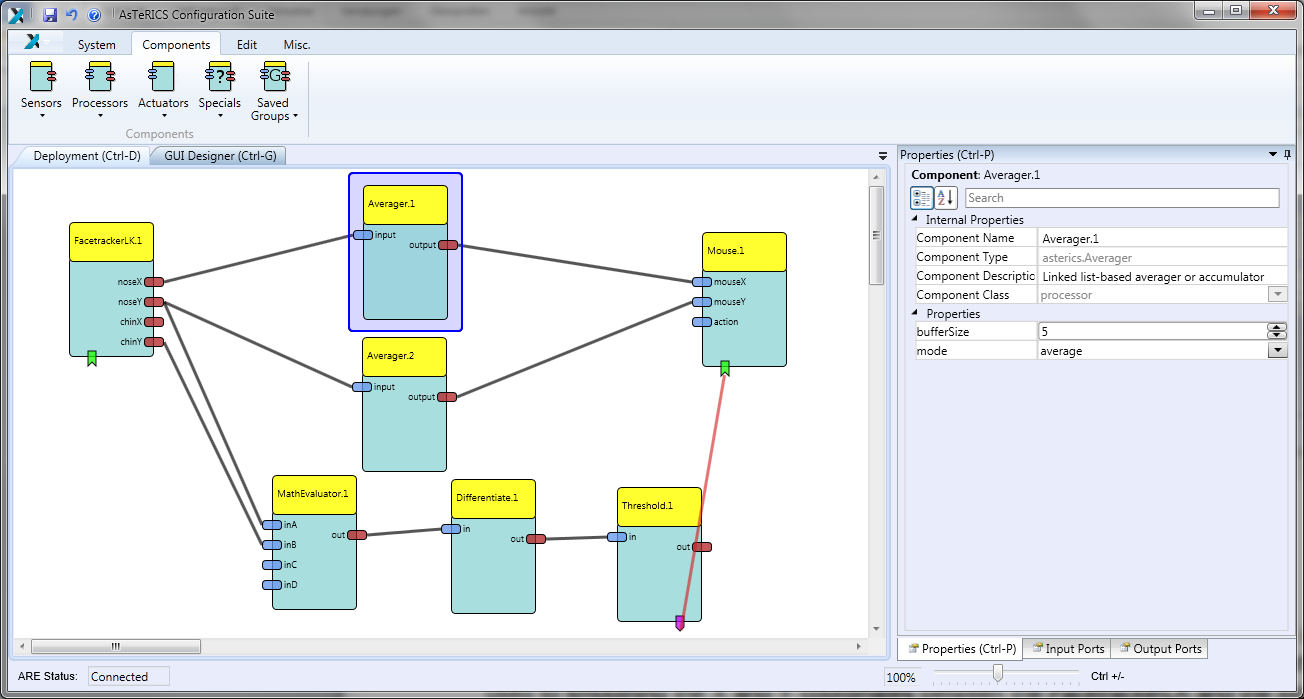
That’s all, just upload the model and start it now.
# Adjusting the Webcam
If you don’t like the position of the webcam after starting the model, you can set a different start position. Select the GUI Designer tab above the drawing area and move the webcam window to an area, which is comfortable to you. Also the size of the window can be adjusted.
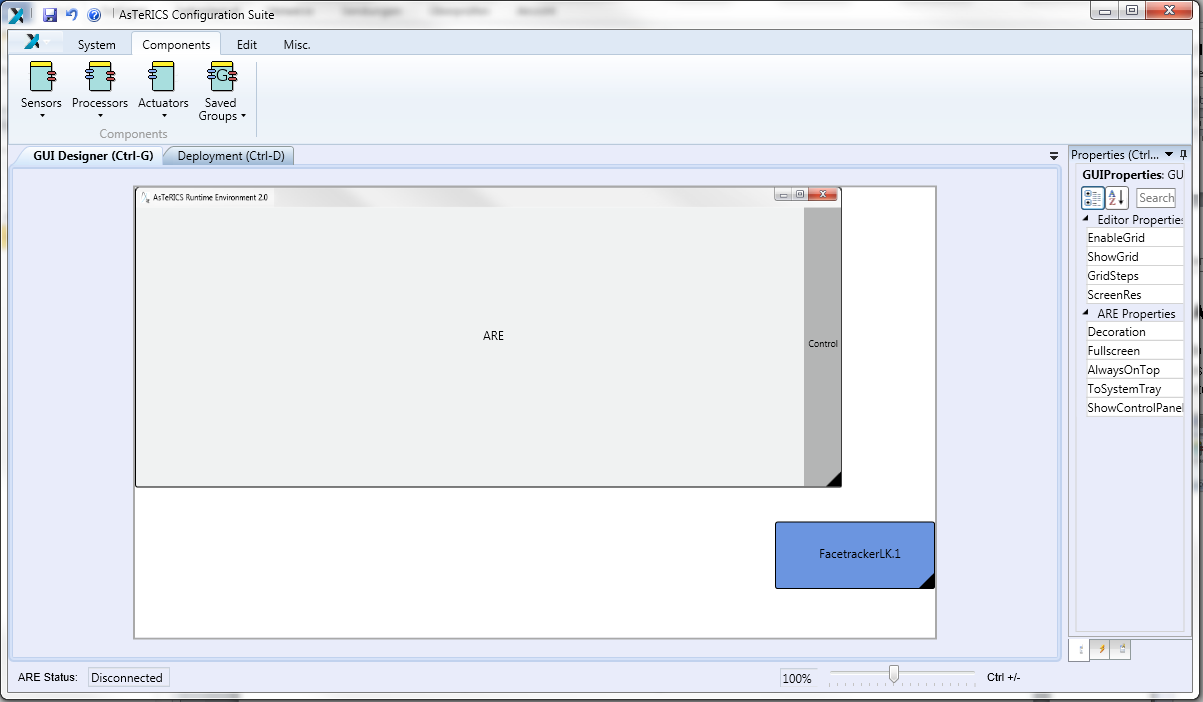
Upload and start the model to work with the changes.
# Camera Mouse Advanced
If your first model works, try this more advanced step-by-step tutorial (opens new window) based on slides.