# Grid Creation
In this tutorial you will learn how to create a simple grid.
Note
In case you need more detailed information, please check the AsTeRICS Grid user manual.
# AsTeRICS Grid web application
AsTeRICS Grid is the web application to run and manage grids for AAC.
If you open the link https://grid.asterics.eu (opens new window), the default grid is opened in your browser and saved locally on your device in the browser cache. All modifications are also saved to your local version of the grid from now on.
# Create New grid
To create a new grid do the following steps
- Click on
Manage grids - Click on
New Grid - Enter the name of the new grid at the bottom of the page and click on the check mark button.
The new grid is added to the bottom of the list of Saved Grids.
# Add cells
Now you must add cells to the newly created grid. You can do this by the following steps:
- Clicking on the
Editbutton of the new grid. - Click on the
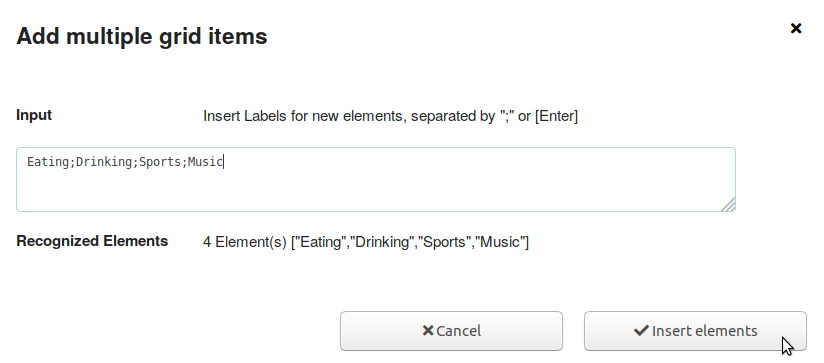
Create new elementslink. - Enter the labels of multiple cells in the textfield

- Click on
Insert elements
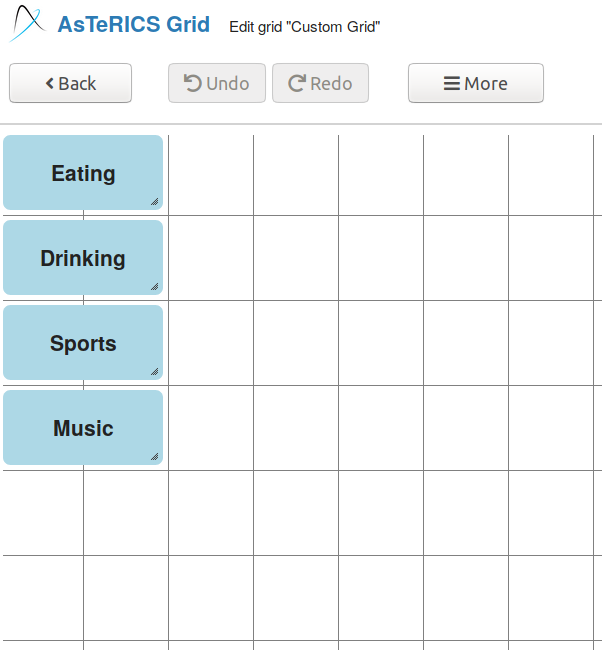
Finally the grid should look like in the picture below.

# Adapt layout
Now you can change the size and layout of the cells.
# Change size
To change the size of the cell, click on the right bottom corner and drag it until the target size is reached.
# Change position
To change the position of a cell, click on it and drag it to the new target position.
# More options
There are many more options to add or delete cells or to do automatic layout. The options can be found by clicking on the More button.
# Close Edit mode
After you have finished all changes, you must close the edit mode for being able to use the grid. You can do this by clicking on the button Back in the top menu.
# Conclusion
Now you know how to create a new grid it should look like in the picture below.