# AmazonEchoControl
Component Type: Processors (Subcategory: Home Control)
This plugin is based on the openHAB plugin, but is only used to control the AmazonEchoControl binding (opens new window) from openHAB.
See the openHAB documentation (opens new window).
This component uses the provided REST API of openHAB (opens new window) to read and write the state of different nodes (called items) within the openHAB system.
# Requirements
The plugin expects
- a functional openHAB installation (opens new window)
- Amazon Echo or similar device (opens new window)
# Installation
To run openHAB without password authentication, start openHAB with this command:
# Linux and macOS
./start_debug.sh
or on a debian-based system this should be:
sudo openhab-cli start
# Windows
in the openHAB folder, double click on
start_debug.bat
After installing and running openHAB, start the browser and use https://localhost:8080 (opens new window) for HTTP or https://localhost:8443 (opens new window) for HTTPS.
See the (openHAB installation guide (opens new window)).
# Initial Setup of openHAB
Before this plugin can be used, the openHAB must be initialized and the AmazonEchoControl binding must be installed. The following steps, based on the openHAB first-time setup (opens new window), must be done
# Connect Amazon Account
- Select Standard (recommended setup), this step can take a while
- Select the PAPER UI
- Go to Add-ons in the control panel and on Tab BINDINGS and search for Amazon Echo Control Binding and click install.
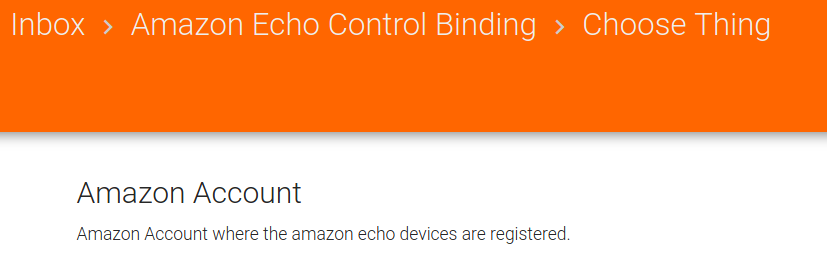
- Go to Configuration and click on Things and click on
Amazon Echo Control Binding. - Click on Amazon Account and accept it by pressing on the tick
- After that, use this link to connect openHAB with your Amazon Account (http://localhost:8080/amazonechocontrol/ (opens new window)).
- Back in the Configuration menu click on Things, the account should be online.
if not, follow the instruction at: openHAB: AmazonEchoControl-Binding (opens new window)

# Setup Amazon Device
The Amazon device must be setup within your amazon alexa account (opens new window) or using the amazon alexa app.
- Switch on Simple Mode in Configuration/System
- If everything worked, go to Inbox and accept the new Things.
- The things will show up in the Control area.
- Link all channels to make them available as items

# AmazonEchoControl Plugin

# Input Port Description
- jsonCommand [string]: Set a new state of an item, e.g.
{"ItemSuffix": "player", "value": "PLAY"}.
The field itemSuffix represents the suffix (from the last_to the end of the item id) of an item only. The value represents the new state of the item. The itemsuffix has to be written lowercase and the value has to be written in uppercase. For a list of available items, see (http://localhost:8080/rest/items). _ Examples: _{"ItemSuffix": "musicProviderId", "value": "SPOTIFY"}for changing the provider _{"ItemSuffix": "volume", "value": "50"}for changing the volume _{"ItemSuffix": "playMusicVoiceCommand", "value": "Yesterday from the Beatles"}for listening to a new song
# Output Port Description
- currentState: The current state of the item, which was changed with the latest jsonCommand.
- currentTitle: The title of the current song playing.
- cmdResponse: The response of the latest jsonCommand. Shows OK if the cmd was correct or ERROR if it was not (plus a more detailed error message)
# Event Listener Description

# Event Trigger Description
This plugin has two event triggers:
- turnedOn: Sent, when the music starts
- turnedOff: Sent, when the music is paused/stopped.
# Properties
- updaterate [integer]: Time in milliseconds, which will ellapse between each status update. Default: 1s (1000ms)
- hostname [string]: Hostname to connect to. It is possible to use a hostname, an IP adress or a FQDN
- port [string]: Port of the openHAB installation. Defaults: 8080 for HTTP, 8443 for HTTPS. Please take care of any blocking firewall.
- protocol: Protocol to connect to openHAB. Either http or https may be used (recommended: https).
- lazyCertificates [boolean]: If this property is set, any SSL related certificate check will be removed for the given hostname. This affects the whole ARE.
- username [string]: This property is used, if the HTTP basic authentication of openHAB is used. Provide the username here.
- password [string]: This property is used, if the HTTP basic authentication of openHAB is used. Provide the password here.
# Additional hints
- The model will stop with an error message, if one of the item names in the properties is not found.
- There is no feedback for checking a successful state change. E.g.: if your write to a read-only item (temperature sensor), nothing will happen
- Use the lazyCertificates property with care, it will disable a major part of the SSL handshaking for the whole Java session. It should be limited to the given hostname only, but without warranty.
- The username/password combination from the properties is saved in PLAINTEXT in the model file, so handle it with care.